Did you know you can make your own stamps out of things like potatoes? That's a little messy so here are stamps I made out of erasers and eraser-like carving material. If you start at the beginning, I have a build-along so you can see just how to do it yourself. All blog photos and content Copyright Fayme Harper 2014
Thursday, December 08, 2005
Stamp Lovers Only
I've renamed the blog to match a business I tried to start once. Another store opened with a very similar name so I never followed through on my plans. Call it nostalgia, but it's good to see the old name back.
Sunday, September 04, 2005

Tips and tricks
Say you just carved a left facing dog, and you need a right facing dog. Take a blank eraser, ink up your left facing dog, stamp it carefully on your blank stamp, and carve it. Viola! Now you have a dog facing the other way.

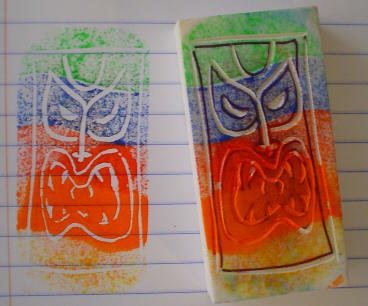
Here is the final print, the way the stamp looks, and the ink pad I used. Be sure to use water based ink until you are done with the carving process. To clean your stamps, put two folded paper towel on a plate, spritz with water, and then spritz with window cleaner. Clean off excess ink by stamping on the paper towels, then rinse in clean water and dry with paper towel.

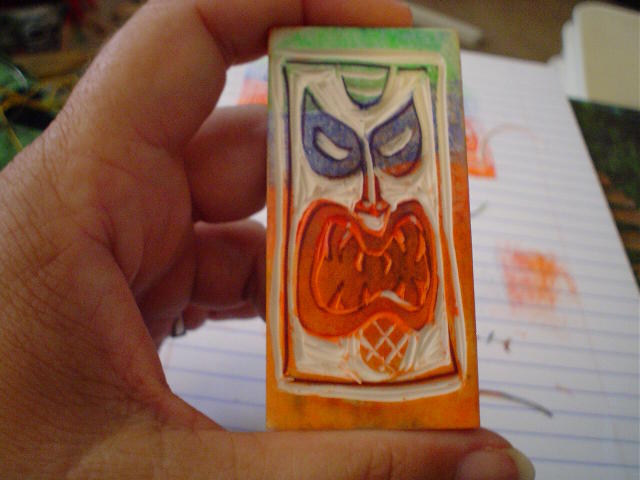
Keep carving and doing test prints until it looks the way you want it to. The small holes under the eyes were done with the point of a toothpick. Normally I would trim off the border, but in this case I think it added to the effect. Some artists like to remove all excess carving ridges, while others feel that adds to the hand carved look. Remember, once you carve it away you can't put it back. If all else fails you can still clean it and use it as an eraser. Don't be afraid to start over...right now you are just learning anyway.

I carved the entire stamp using the tip you see here. That is not typical though. Sometimes a piece of eraser will lay back down in its groove and fake you out. So I like to lay the stamp face down on scrap paper and rub it gently from side to side. That will grab the crumbs and clean them out of your stamp. If it gets really bad, run water over it and dry with a paper towel.
Step 2:

Step 2
Notice how I often carve 'around the lines' not on the lines. I also make corrections as I cut, compensating for blips in the drawing.
Step one
Assemble all your supplies and decide what art you want on your stamp.
I like to freehand draw my art on an eraser with a sharpie marker. Most people aren't that brave. You can also transfer your design with graphite paper or carbon paper. Keep in mind that the final print will be reversed. On my design it didn't matter, but it will matter if you are carving letters or numbers, or need the art to face left or right.
Once you have the design drawn onto the eraser, you are ready to begin carving.

The tools I use are called Linozips. I got mine at an art supply store, but NASCO also carries them. I am getting ready to carve this Tiki image on a Mars Staedler Eraser. The ink label was removed with acetone (nail polish remover). Remember words and designs will be backwords when printed.
Carving Eraser Stamps
Sometime in the early 1980's I got frustrated with the limited designs in the commercial rubber stamping industry. They were too cutesy...you could find all the bunnies and teddies you could ever want but try finding a feminist stamp or one that showed nudity or goddess images, and you were out of luck. Somewhere in that time zone, I started carving my own stamps out of eraser stock. Eventually the eraser companies caught on and started making large sheets just for us eraser carvers. Of course now-a-days you can find stamps on any subject, but nothing provides the same instant gratification that comes with thinking up a stamp design, grabbing a piece of eraser, and less than an hour later holding in your hands the very design you wanted! Recently at the Laguna Beach Sawdust Festival, I got to sit down and make a lithograph print. That reminded me of how much I missed making my own stamps. Then today I realized that since my main stamp carving days were before the internet crashed into me, that I'd never documented the hundreds of images I've carved. I thought it was high time to use my digital camera to document that body of work, and thus this new blog was born. Please visit my other blogs for more about the Sawdust Festival and my artwork.
Subscribe to:
Posts (Atom)